
For a complete list of applicable models, see Razer Blades with two storage drive slots.
Redundant Array of Independent Disks (RAID) allows two M.2 SSDs to operate together for increased read/write performance or data redundancy. Razer Blade models with Intel 11th Gen CPU and newer support RAID 0 and RAID 1 using Intel® Rapid Storage Technology. This process requires a full reinstall of Windows — back up all data before proceeding.
-
RAID 0 (Stripe) — Data is split equally across two drives, doubling read and write speeds. If one drive fails, all data is lost. Use this configuration for performance.
-
RAID 1 (Mirror) — Data is written identically to both drives. If one drive fails, the other retains a complete copy. Use this configuration for data protection.
Important:
-
This process requires a fresh installation of Windows. Back up all files before proceeding.
-
Any modification to the Razer Blade is not covered by the Razer Warranty Policy.
Requirements:
-
Two compatible M.2 SSDs installed in the Razer Blade. Use drives with identical storage capacity and speed for best results.
-
A Windows 11 installation USB drive.
-
A second USB drive formatted as FAT32 to hold the Intel RST driver files.
-
The correct Intel RST driver for your Razer Blade model — see the table below.
Intel RST driver by Razer Blade model
Download the latest driver directly from Intel. The Intel Download Center always serves the current version.
Razer Blade 18 (2025)
Core Ultra 9 275HX (Arrow Lake HX, Series 2)
Razer Blade 18 (2024)
Razer Blade 16 (2023)
Razer Blade 18 (2023)
Razer Blade 15 (2022)
Razer Blade 17 (2022)
Core i9-13950HX
Core i9-12900H (11th–14th Gen)
Note: The Razer Blade 16 (2026) uses a different CPU architecture (Panther Lake / Core Ultra Series 3) from all other models listed. Use the correct driver link for your specific model year.
Follow the detailed instructions below to set up RAID on the Razer Blade.
Step-by-step Process
Download and prepare the RST driver
Complete these steps on a working PC before beginning RAID setup on the Razer Blade.
-
Open the Intel RST download link for your Razer Blade model from the table above, accept the license agreement, and download "SetupRST.exe".
-
Plug in a FAT32-formatted USB drive.
-
Open "PowerShell" or "Terminal" in the folder containing "SetupRST.exe" (right-click the folder and select "Open in Terminal").
-
Run the following command to extract the driver files:
.\SetupRST.exe -extractdrivers C:\RST_Drivers
-
Copy the contents of C:\RST_Drivers to the FAT32 USB drive.
Enable Intel VMD in BIOS
-
Shut down the Razer Blade. Make sure both M.2 SSDs are installed.
-
Power on and press "F1" or "Del" repeatedly to enter BIOS. See How to access the BIOS settings on the Razer Blade.
-
Go to the "Advanced" tab.
-
Locate "Intel VMD Technology" and change it from "Disabled" to "Enabled".

-
Press "F4" or go to "Save & Exit" > "Save Changes and Reset". The system reboots.
Note: After enabling VMD, the existing Windows installation no longer boots. This is expected — VMD changes how the SSDs are presented to the operating system. Proceed to the next section.
Create the RAID volume in BIOS
-
After the system reboots, press "F1" or "Del" again to re-enter BIOS.
-
Go to "Advanced" > "Intel(R) Rapid Storage Technology". This menu appears only after VMD is enabled.

-
Select "Create RAID Volume".

-
Configure the volume:
-
Name: Enter a name such as "Volume0".
-
RAID Level: Select "RAID0 (Stripe)" or "RAID1 (Mirror)".
-
Select Disks: Mark both SSDs with an "X".
-
Capacity: Leave at the default (maximum).

-
-
Select "Create Volume" and confirm.

-
Press "F4" to save and exit BIOS.
Install Windows
-
Insert the Windows 11 installation USB drive.
-
Power on the Razer Blade and press "F12" to open the boot menu. Select the Windows installation USB drive.
-
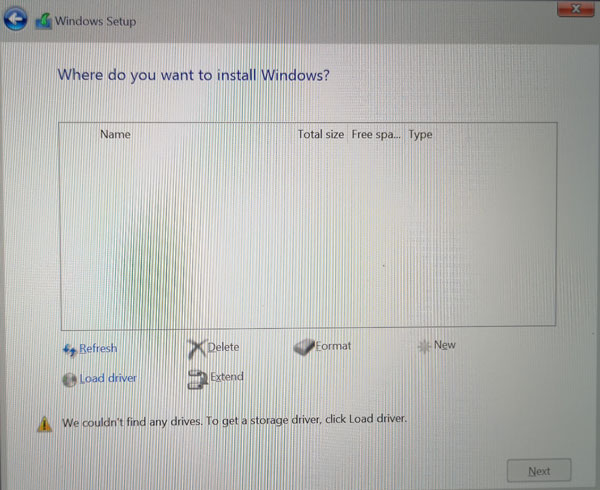
Follow the Windows setup until the "Where do you want to install Windows?" screen.

-
If no drives are listed, click "Load Driver".
-
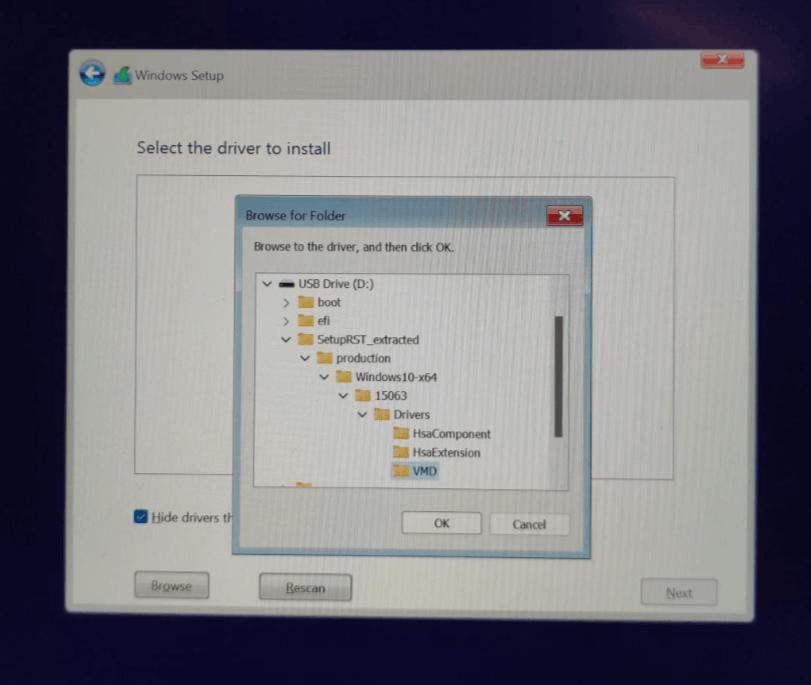
Insert the FAT32 USB drive containing the extracted RST driver files.
-
Browse to the USB drive and select the Intel VMD driver folder, then click "OK".
-
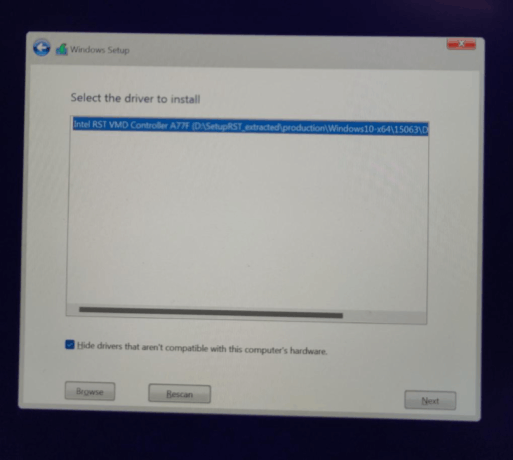
Select the driver from the list and click "Next".
-
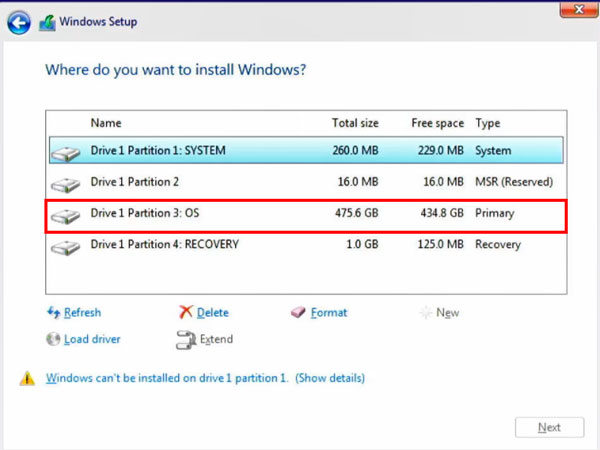
After driver installation completes, the RAID volume appears as a single drive. Select it and click "Next".
-
Wait for Windows installation to complete.
Note: If the driver USB drive is not recognized, confirm it is formatted as FAT32 and that the extracted driver files are at the root level of the drive.
Post-installation
-
Once Windows is installed, run "SetupRST.exe" to install the Intel RST driver in Windows.
-
Open "Device Manager" and confirm an "Intel RAID 0 Volume" or "Intel RAID 1 Volume" entry appears under "Disk drives".
-
Install all Razer Blade drivers from the Razer Support page for the specific model.
Troubleshooting
No drives shown during Windows installation
-
Confirm the RST driver USB drive is formatted as FAT32.
-
Confirm "Intel VMD Technology" is set to "Enabled" in BIOS.
-
Confirm the downloaded RST driver matches the Razer Blade model year using the table in the Requirements section above.
Intel(R) Rapid Storage Technology menu not visible in BIOS
-
This menu appears only after "Intel VMD Technology" is enabled and the system has been saved and rebooted.
Intel® Optane™ Memory and Storage Management app not available on Microsoft Store
-
The Microsoft Store app has been discontinued. Use "Device Manager" to verify the RAID volume status after installation. The RST driver installed by SetupRST.exe is sufficient for RAID operation.

